1Set the business up — once
You only do the seven steps below at the start. Getting them right now means you will not have to redo them each period — especially steps 2 and 7, because those two decide how the software calculates money.
Create your organisation
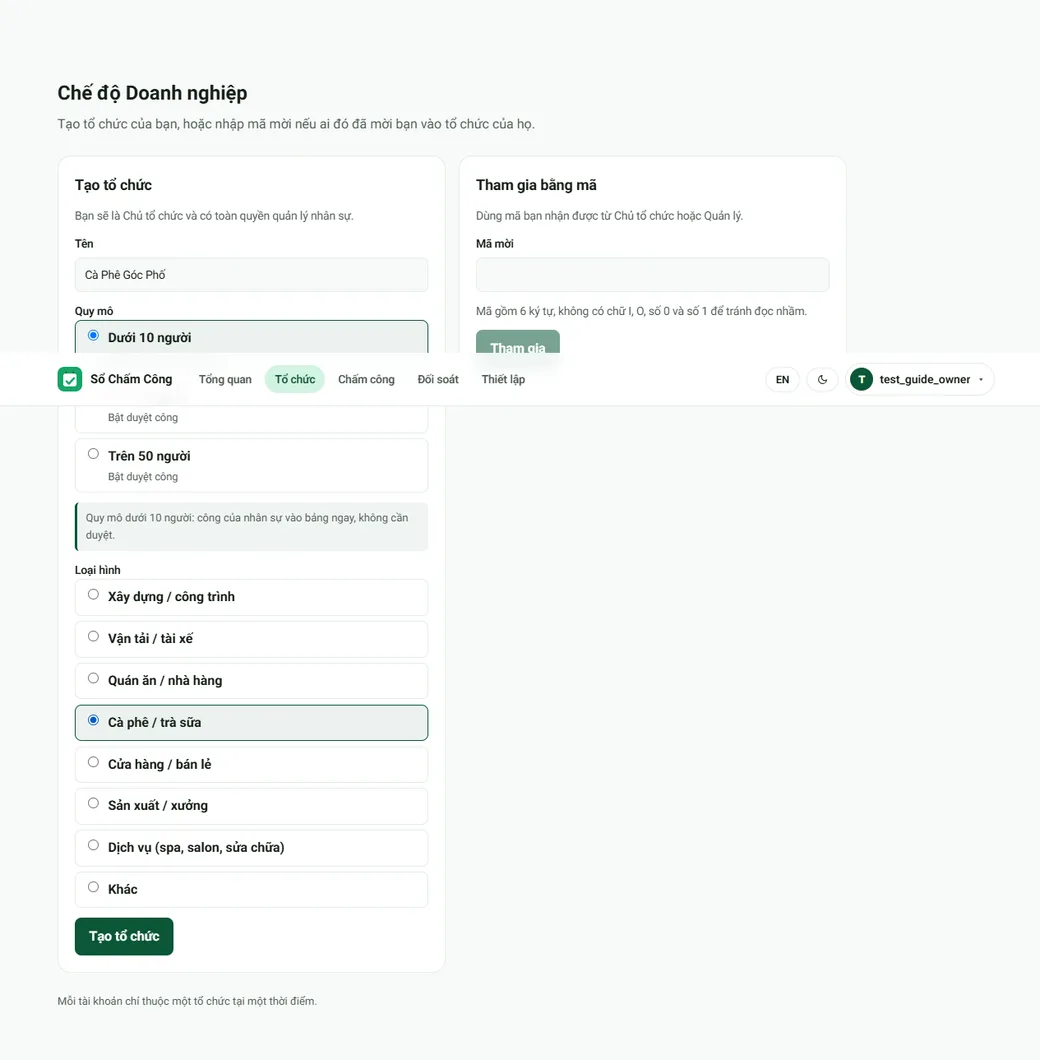
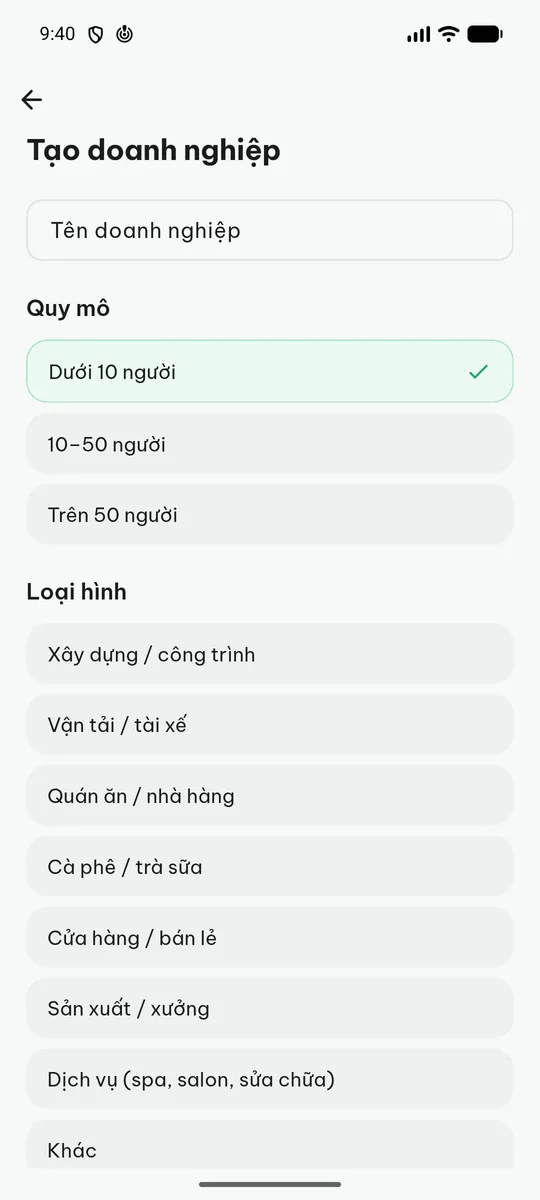
WebAppSign in and open Organization. Fill in three things: the name; the size — pick “under 10 people” and your staff’s logged days go straight into the timesheet, while a larger size turns on approval for the whole business from the first second; and the business type — what you do, chosen from eight groups, with “Other” if none of them fit. After this you are the owner, and you get a six-character organisation code to hand out to your staff.
Set the pay period and closing day
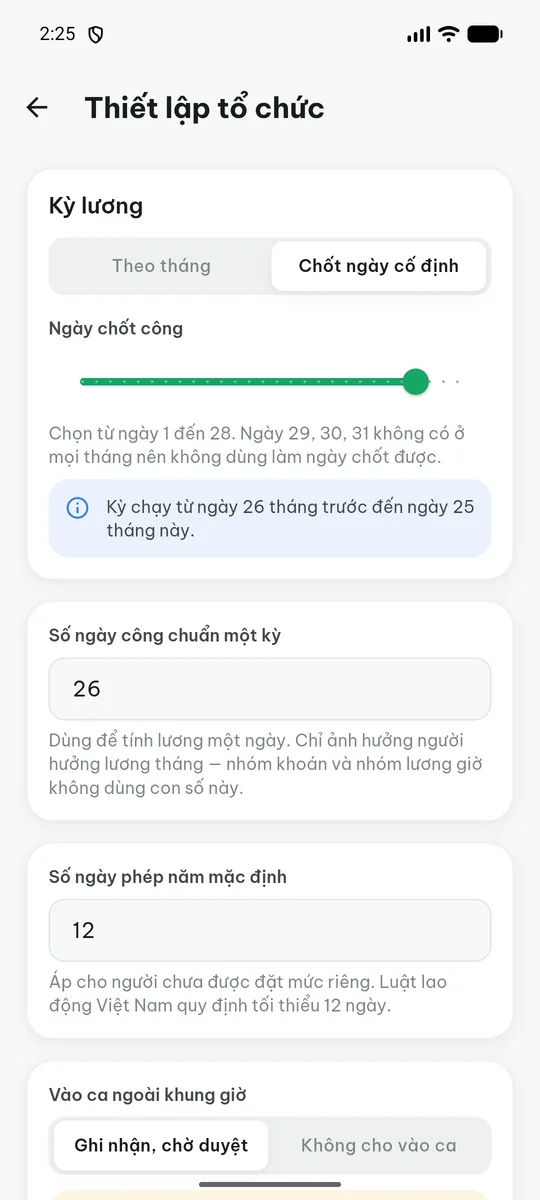
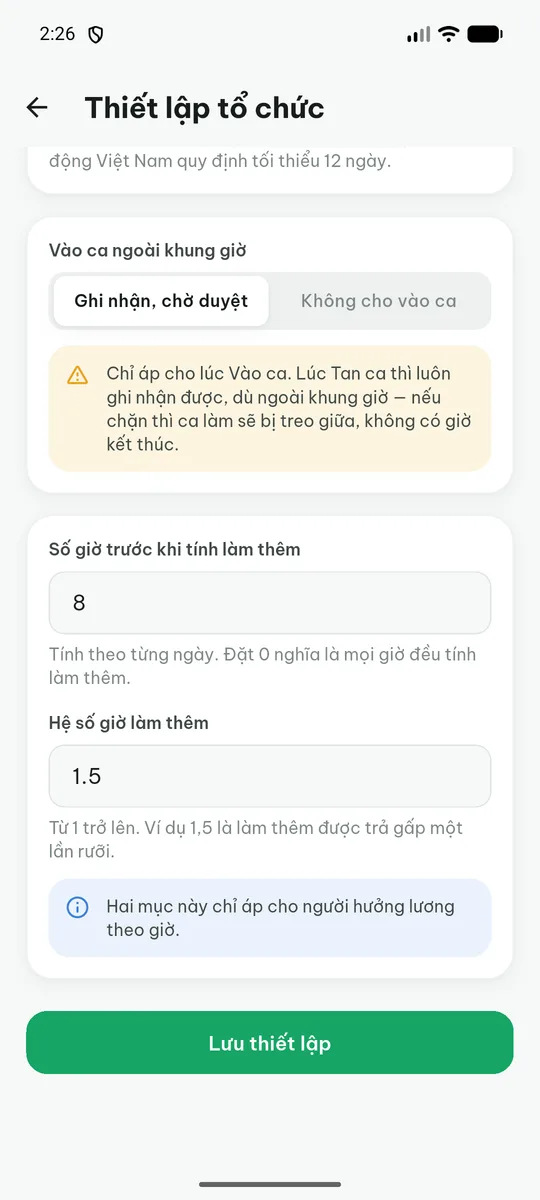
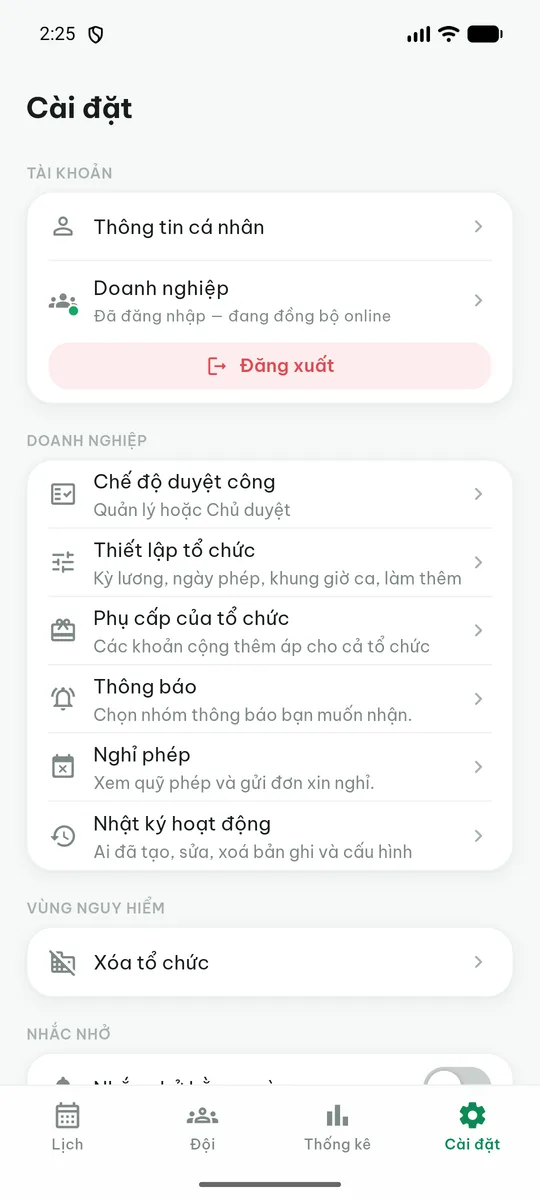
AppWebThis is the most important setting: it decides when your period starts and ends, and every figure for days and money after that counts from it. In the app go to Settings → Organization setup and choose “by month” or “fixed closing day”, then slide to the day you want. The same screen also holds the standard working days (the divisor for one day’s pay, which only affects people on a monthly salary), the default leave allowance, the shift window, and the overtime rules.
Set up work types and rates
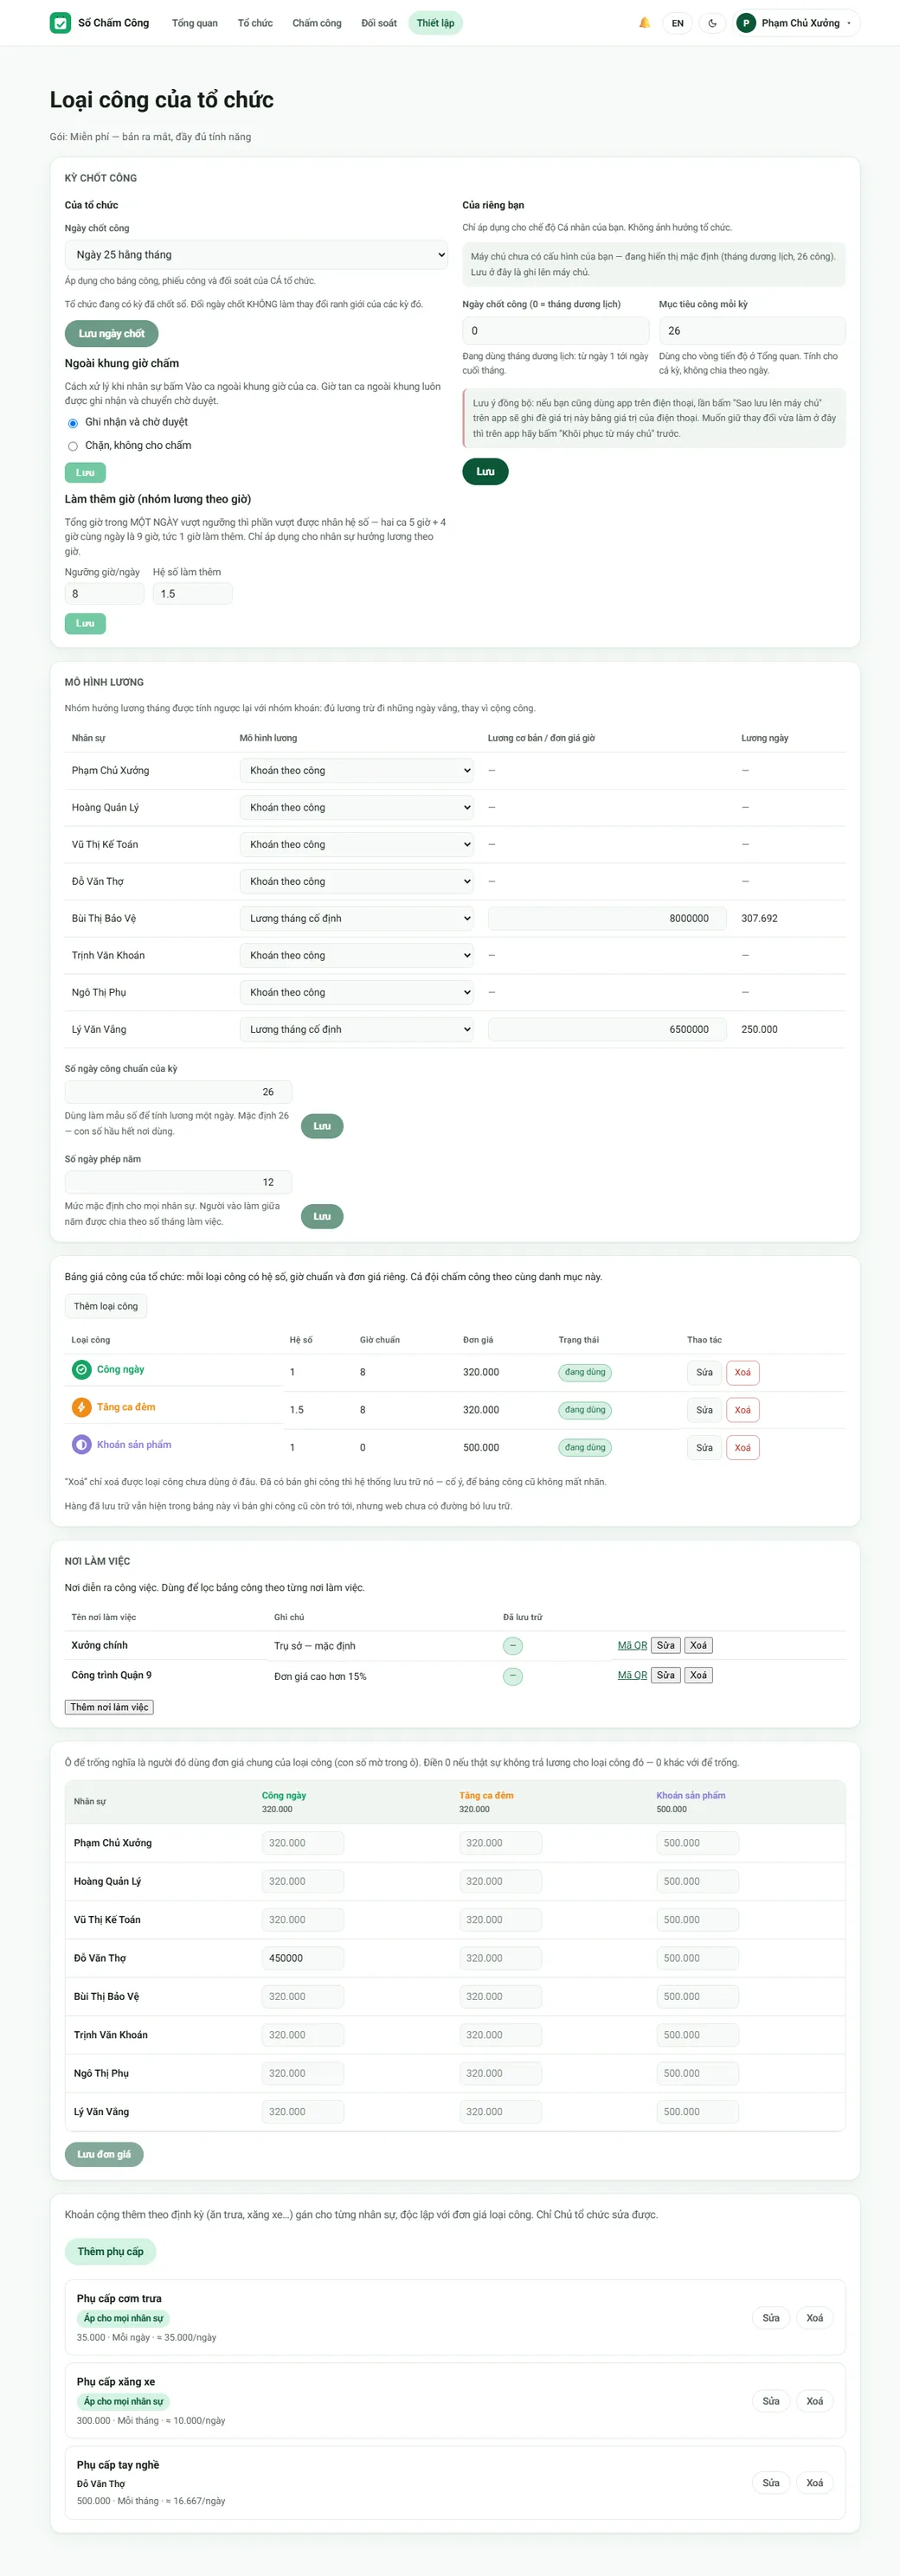
WebAppA “work type” is a kind of working day: a normal day, a night shift, piece work. Each one has a standard rate and a multiplier. Set them up under Settings on the web version, or Team → Work types & rates in the app.
Set the work calendar and hourly coefficients
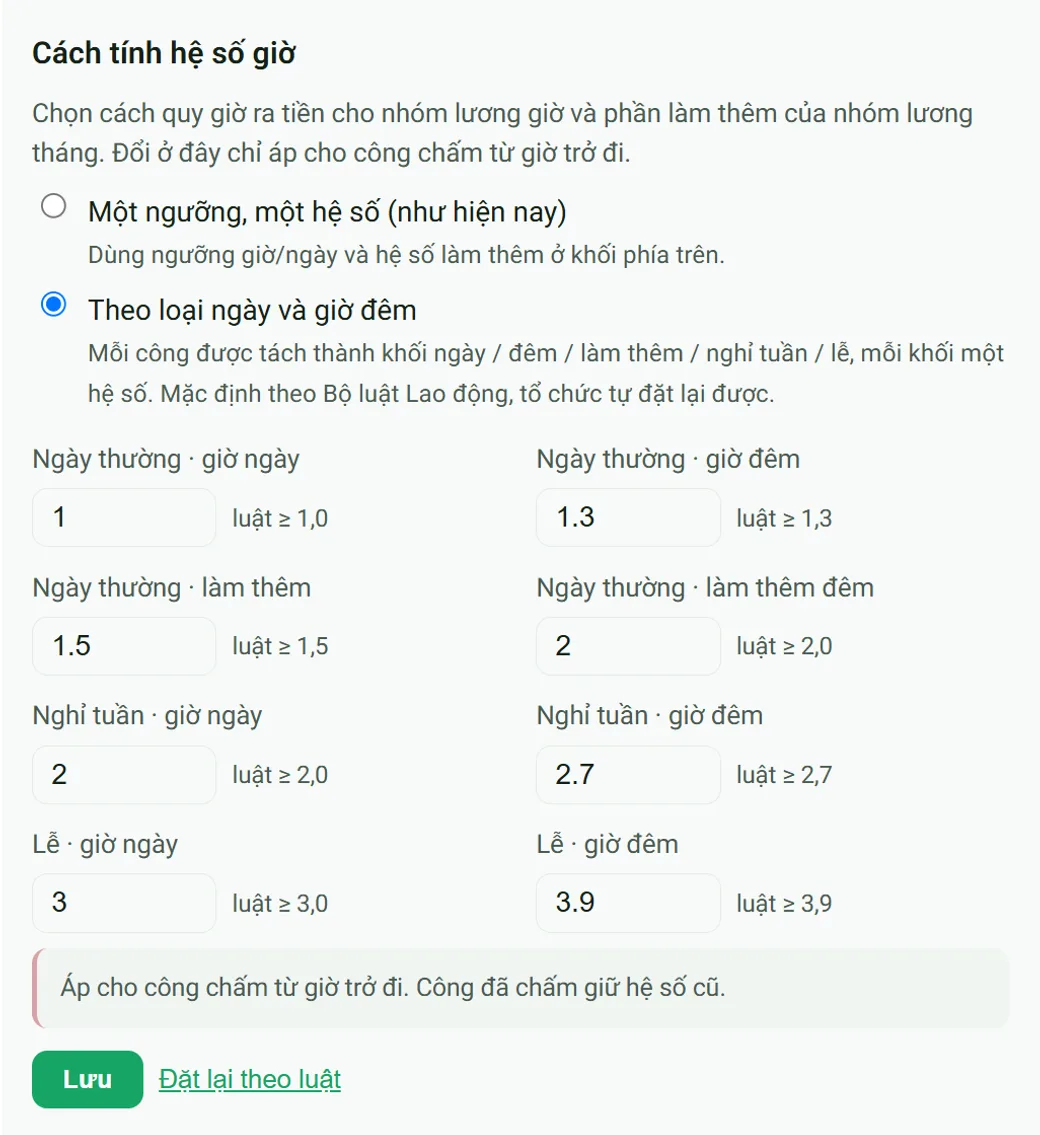
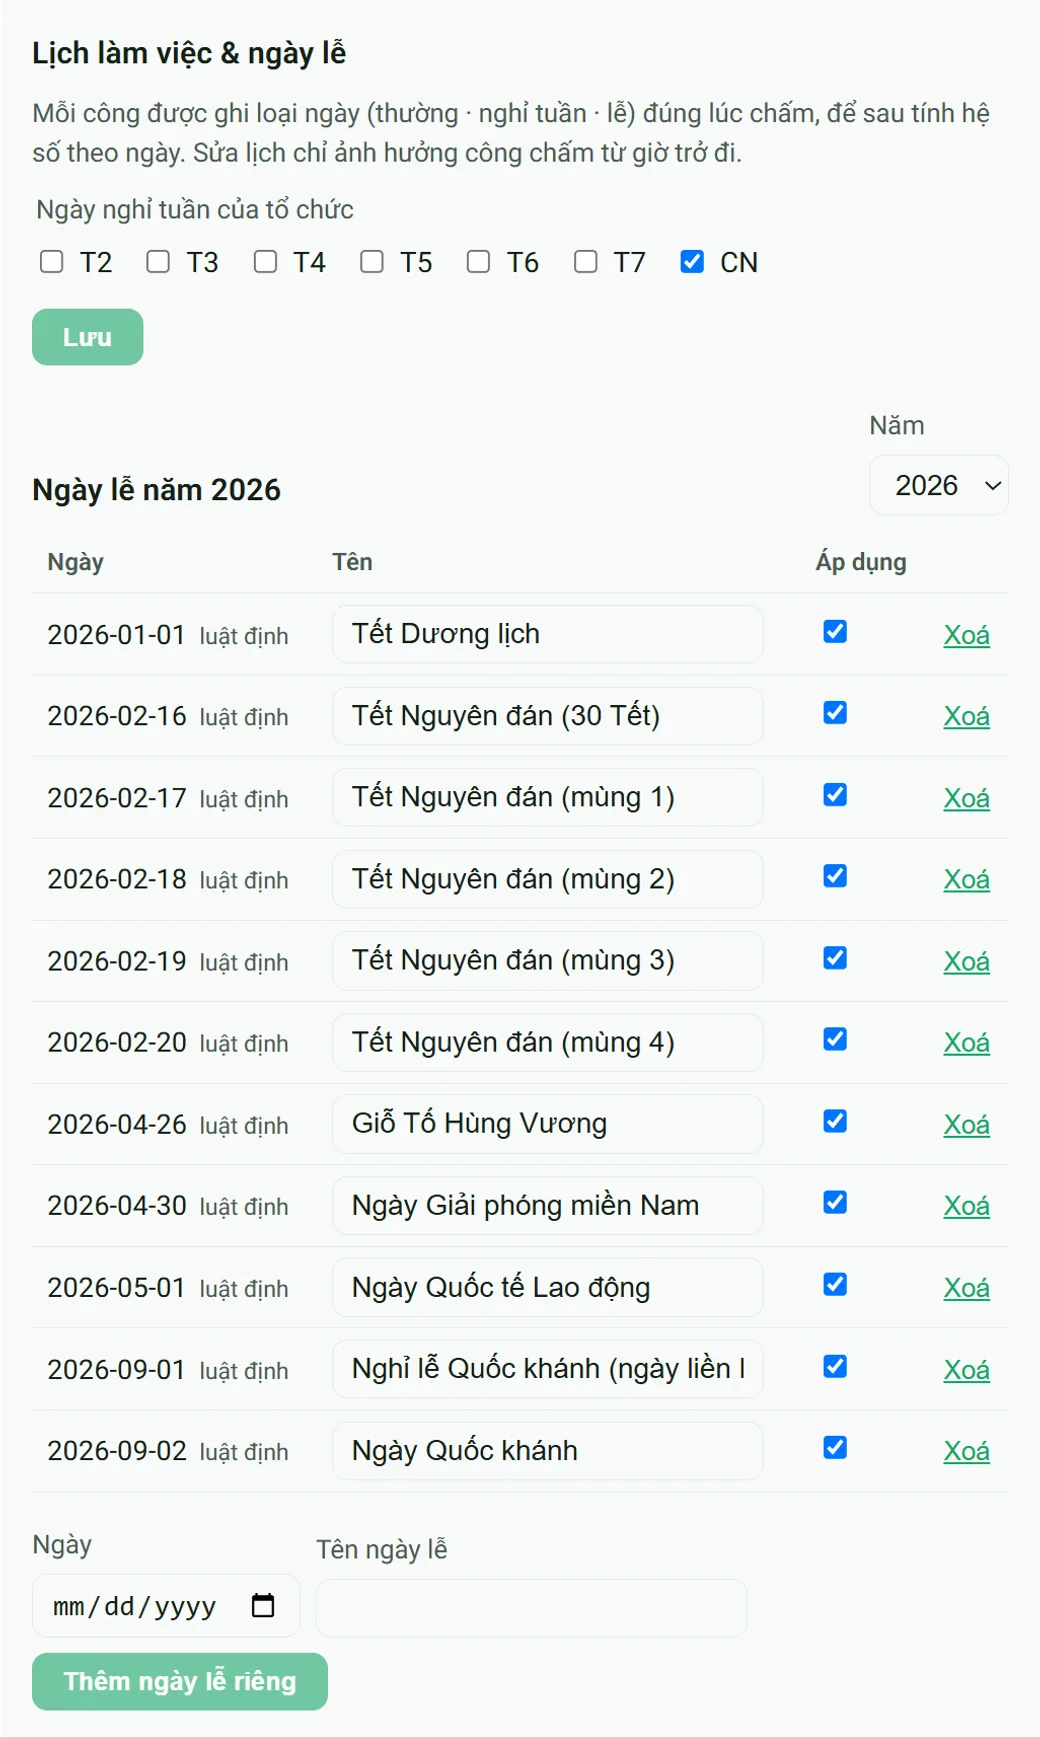
WebAlso under Settings on the web version, two blocks decide what night shifts, rest days and public holidays pay. Hourly coefficients: keep “one threshold, one coefficient” as before, or switch to “by day type and night hours” — each shift is split into day, night, overtime, weekly-rest and holiday blocks, each with its own coefficient. The defaults are the Labour Code floor (night 1.3 · overtime 1.5 · weekly rest 2 · holiday 3) and you can change them. Work calendar and holidays: pick the company’s weekly rest days and switch each public holiday of the year on or off — the 11 statutory holidays are built in, add your own if needed. Anyone whose rest days differ gets their own rest days in their profile.
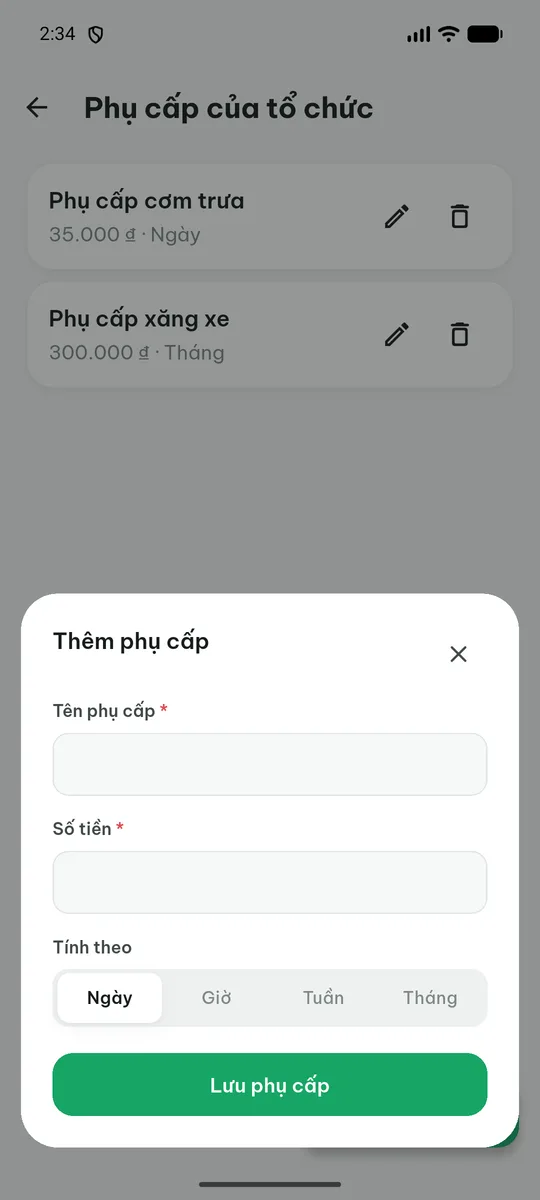
Set up allowances
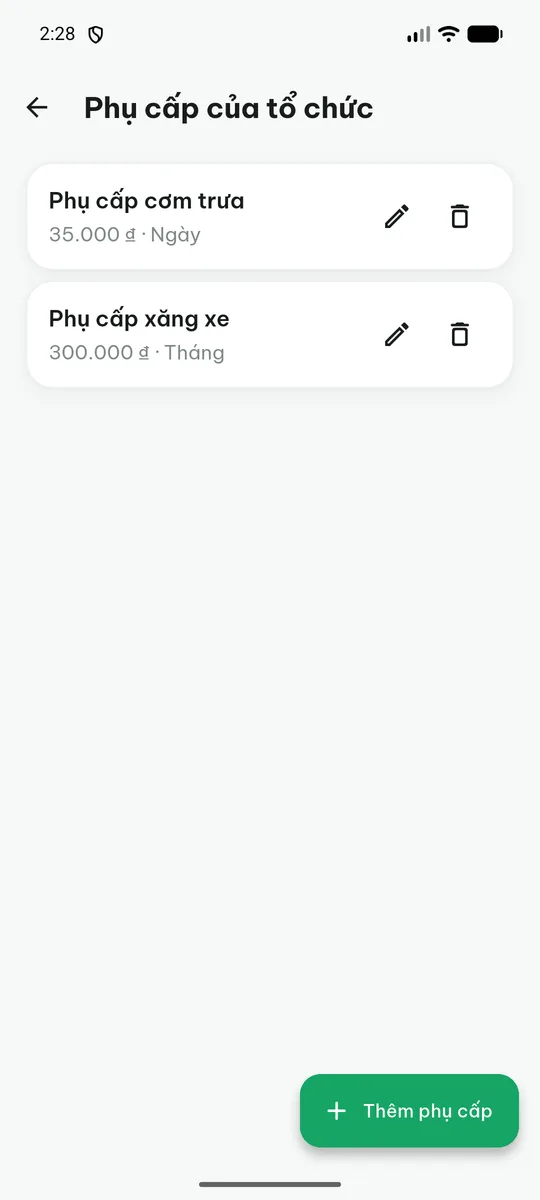
AppWebAllowances are amounts paid on top of the work itself: lunch, fuel, a skill premium. In the app go to Settings → Organization allowances and choose whether it is paid per day, hour, week or month.
Add staff and invite them
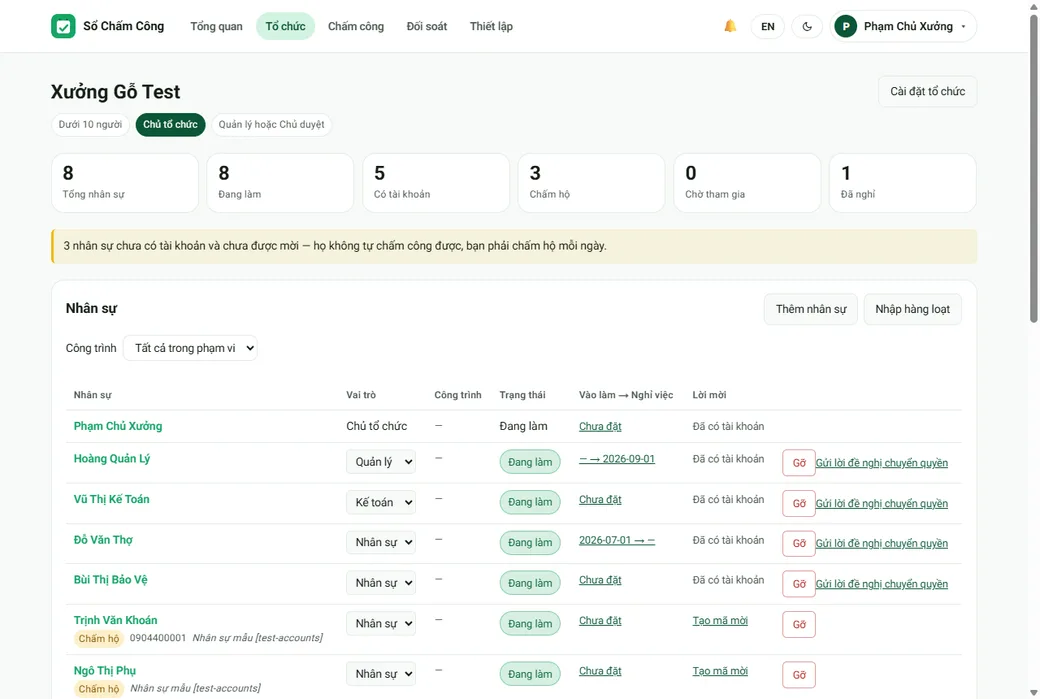
WebAppThere are two kinds of people on the list, and you choose per person. People who log their own attendance: they install the app, sign in with their own account and tap once a day — give them the organisation code or create a personal invite code. People you log for: all you need is a name, no account and no phone.
Mistakes are fixable — you don't start over. If you mistype a name or phone number, open that person's profile and tap Edit details; the workdays already logged for them stay exactly where they are. Adding a name that is already on the list asks you first and shows who it clashes with. When someone you've been tracking for signs up with their own account, the name you gave them is kept — their profile also shows their account name so you can tell it's the same person. And if one person did end up as two rows, the web version can merge them: every workday moves to one place, and for days where both sides logged work you decide each one.
Four roles, differing in who gets to see money
| Role | Log & edit attendance | See money | Manage staff |
|---|---|---|---|
| Owner | Yes | Yes | Yes |
| Manager | Yes | No | Partly |
| Accountant | No | Yes | No |
| Staff | Their own only | Their own only | No |
Choose how each person is paid
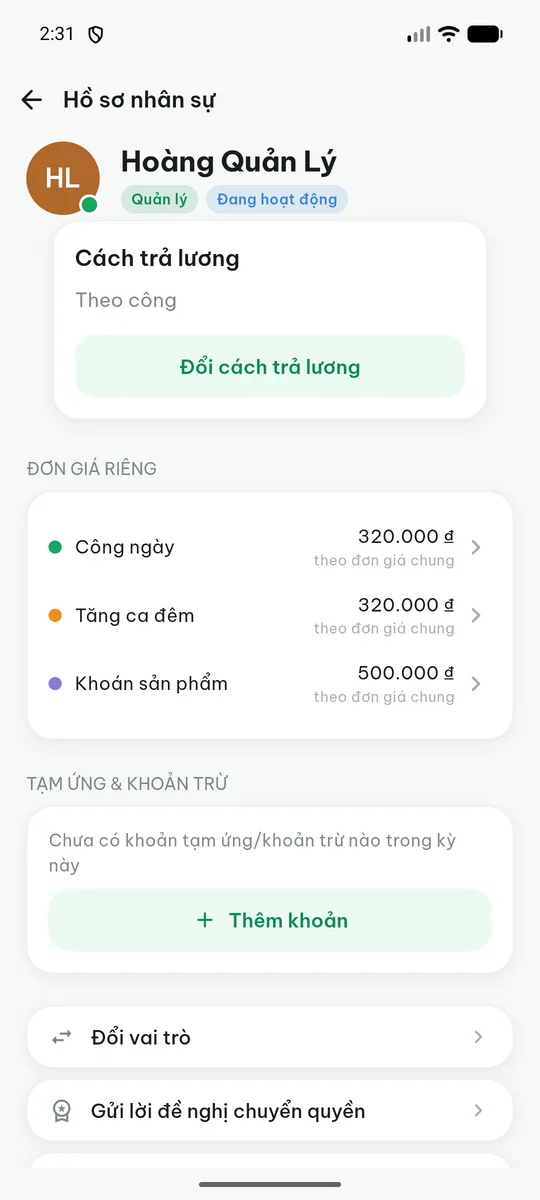
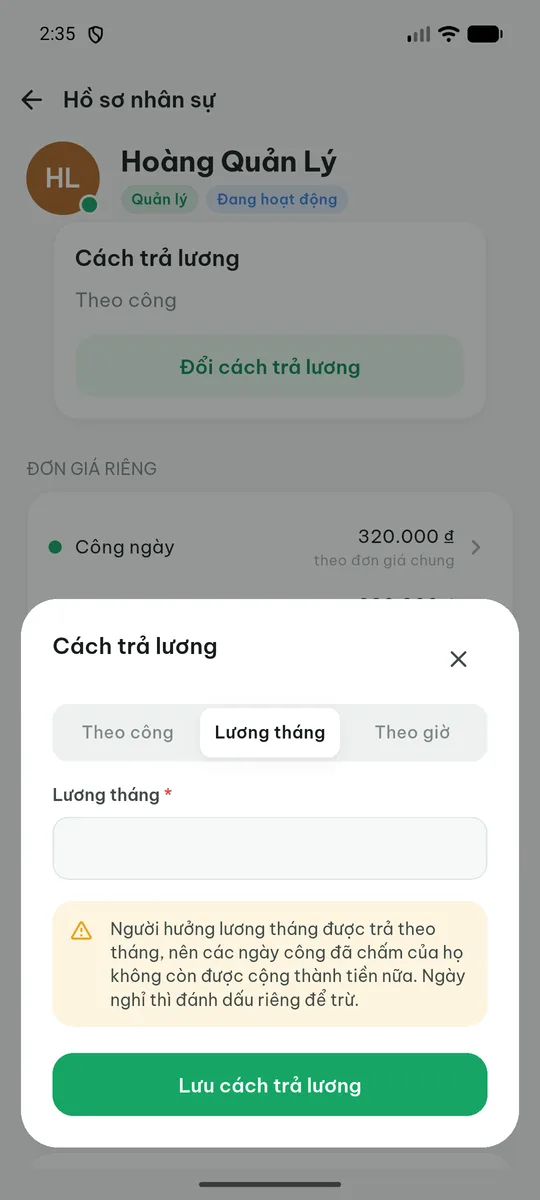
AppWebOpen a staff profile and tap Change how they are paid. Three ways: per shift (the default — a logged day means money, adding up), monthly salary (a fixed amount, reduced only by days off), and hourly (a rate per hour, with overtime past the daily threshold).
2Every day
This part runs daily and happens almost entirely on a phone. You will not need a computer until the end of the period.
Staff log their own attendance
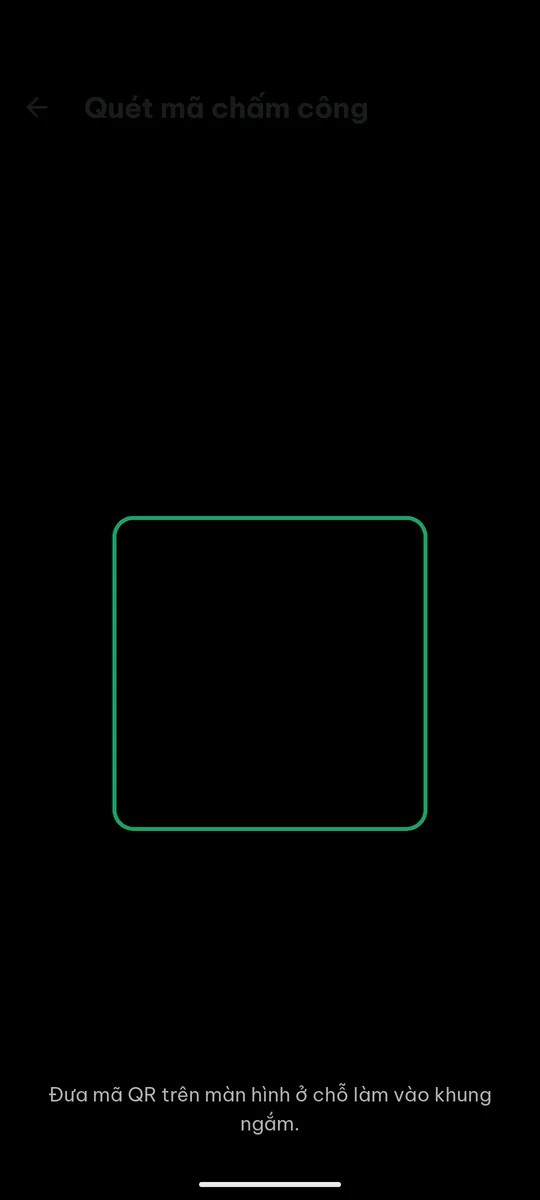
AppAnyone with an account opens the app and taps once under Calendar. Depending on what you switch on, they log attendance one of these ways: a single tap (the simplest, recording a whole day); clock in / clock out (two timestamps, for people paid by the hour); scanning a QR code posted at the site or counter; a location check — taken once, at the moment they tap, not tracked all day; or a shared device — one tablet at the counter that the whole team taps their name on.
Log attendance for the team
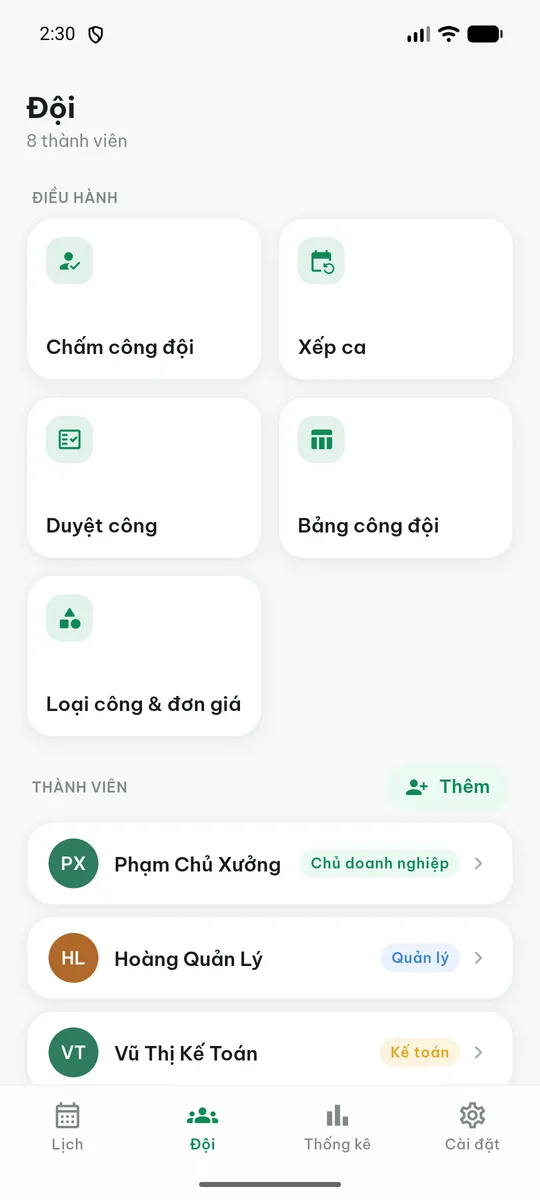
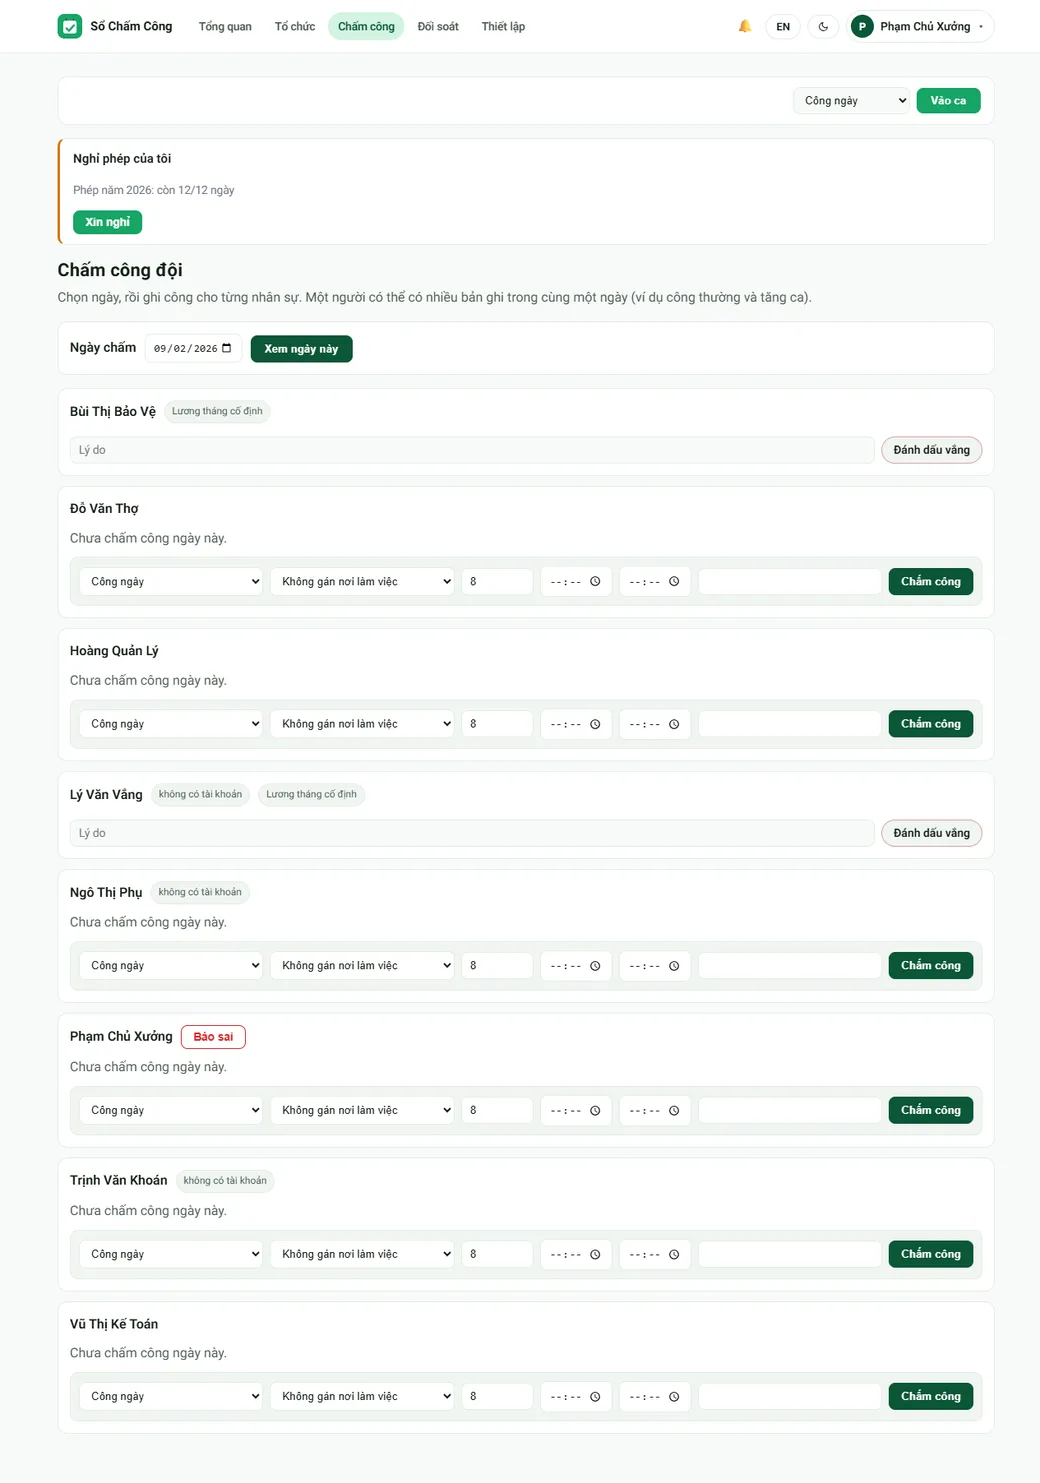
AppWebFor anyone not using the app, you log for them. In the app go to Team → Team attendance: the whole team in a list, tick each person, with a “not yet in” block so nobody is missed. The same job works on the web version, which adds the approval queue and leave requests.
Approve attendance
AppWebIf you turn approval on, anything staff log themselves waits in the approval queue until you confirm it. Three levels under Settings → Approval mode: automatic, manager or owner, or owner only. The same place also handles disputes: a staff member who sees their day recorded wrongly taps to report it, and you review and fix it — no back-and-forth messaging.
Plan shifts
AppWebIf you run on shifts — restaurant, café, shop — go to Team → Shifts to plan the week. Staff can see their own shifts, confirm them, and swap with each other when needed, with you approving. The web version also shows the projected labour cost of the roster you just built, so you know what the week costs before you commit. Create shifts on the schedule first and add people later — or not at all: workers can simply scan the shift code. Turn on Repeat weekly (off by default) so the shift appears in the following weeks; when editing one, choose “this shift only” or “this and following shifts”. On the QR code screen, pick a shift for the code — when staff scan it, their attendance is attached to that shift.
3End of period — close and pay
The last five steps happen on the web version, because this is when you need a wide table and a printer. Reading a timesheet for thirty people on a phone is the wrong device.
Read the timesheet
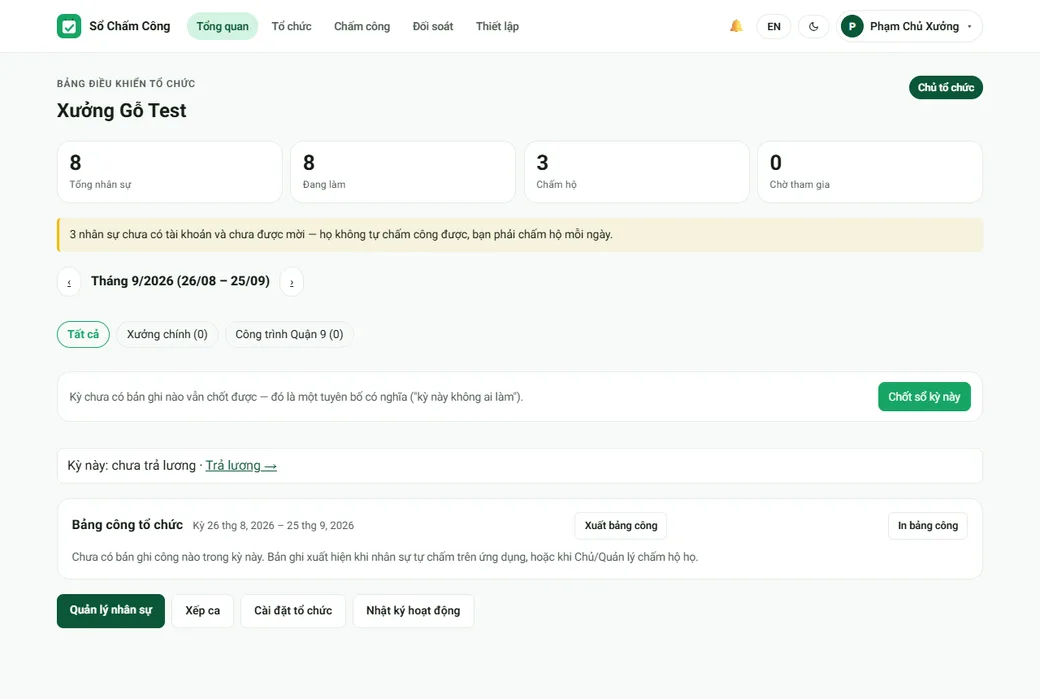
WebOpen Overview. A person-by-day table for the whole period, filterable by site. The last columns are each person’s total days and income.
Record advances and deductions
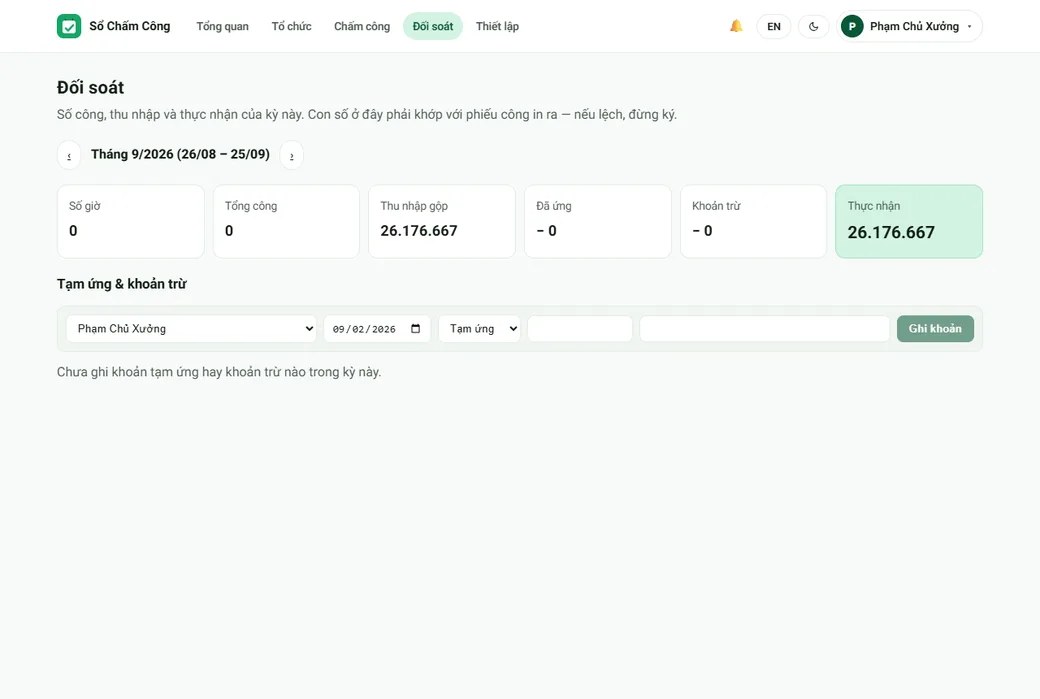
WebAppOpen Reconcile. Record what you have already advanced during the period and anything to be deducted. The software works out net pay — the figure you actually hand over.
Close the period
WebAt the foot of the Overview page, close the period. From then on nobody can edit logged days inside it, and the software takes a snapshot of each person’s days and money.
Pay people
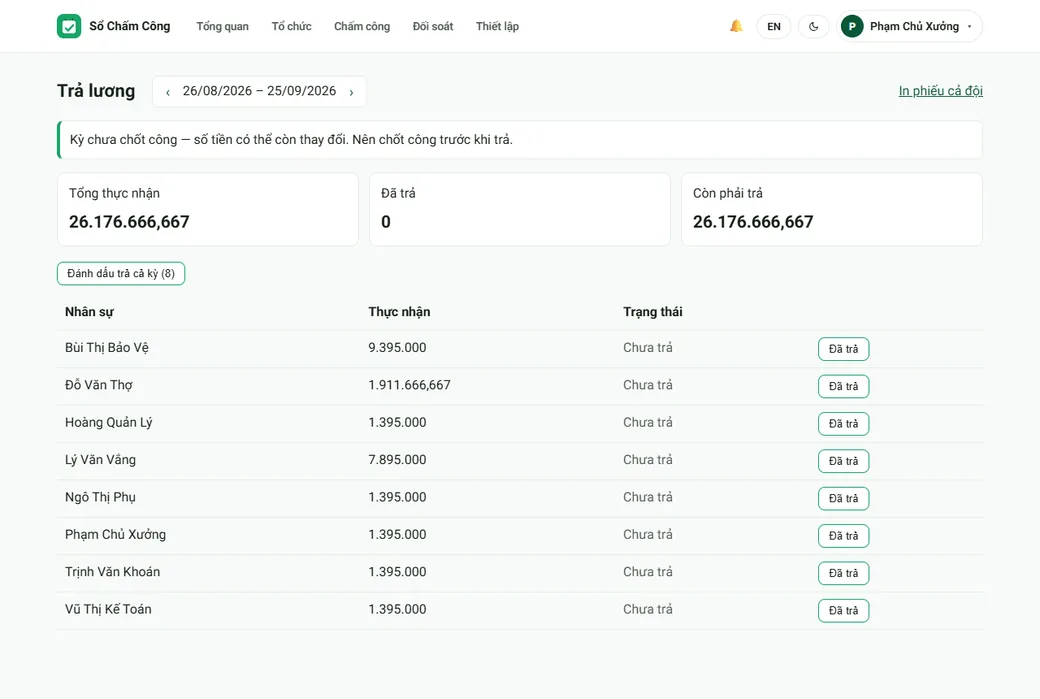
WebOpen Payroll. The page shows the total for this period, how much has been paid, and how much is left. Mark people paid one by one, or the whole period at once.
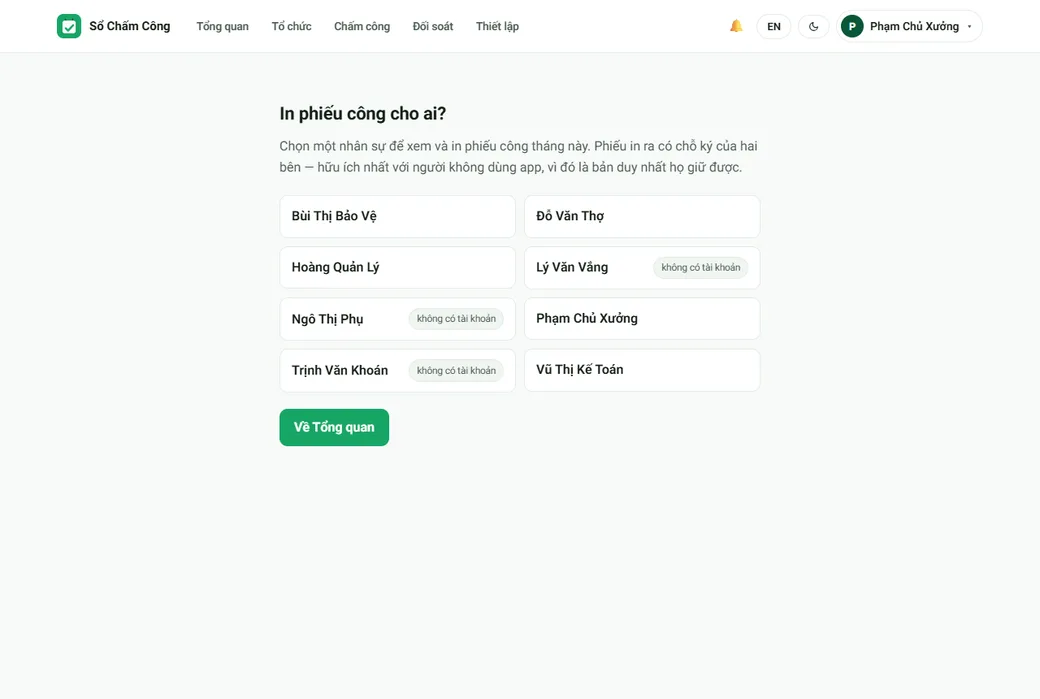
Print the timesheet and pay slips
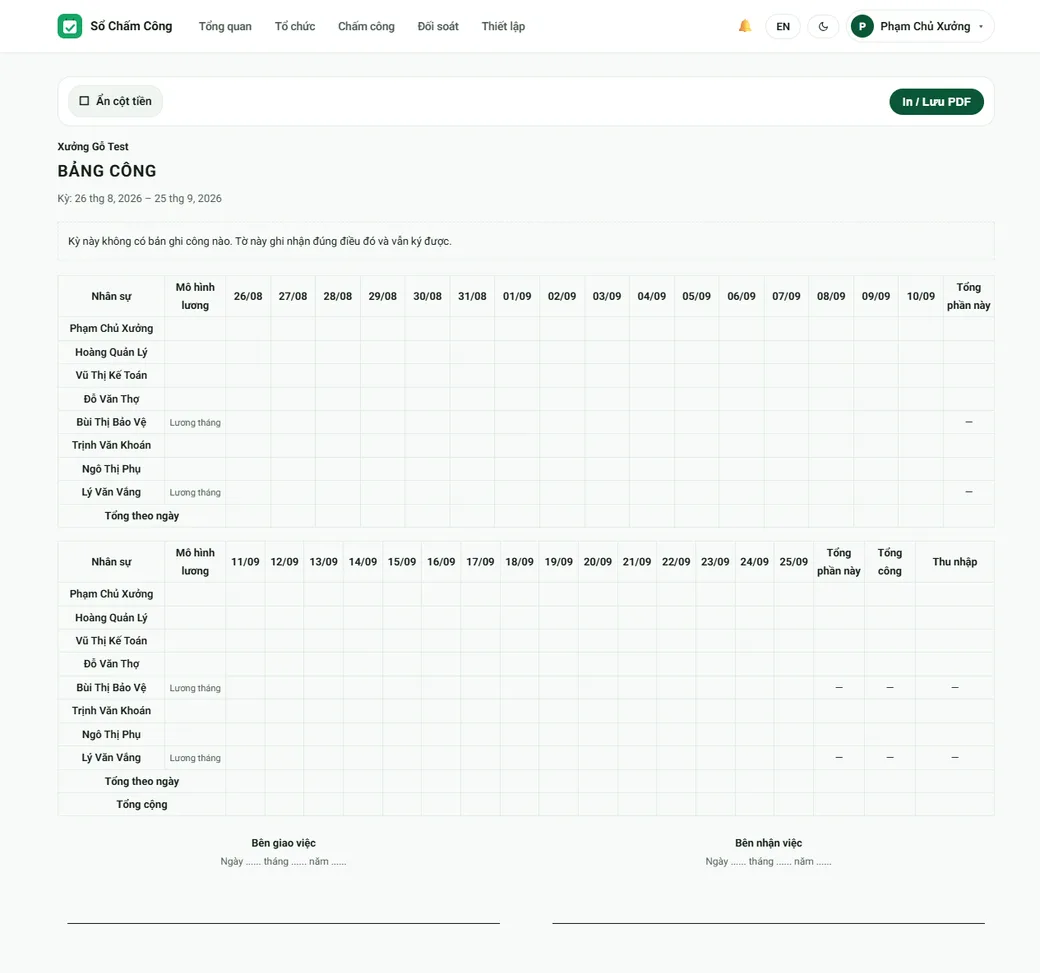
WebTwo things print, for two different jobs. A signable timesheet: the whole team on one sheet with a column for both sides to sign, and money columns you can hide if you only want to check the days. Individual pay slips: one sheet per person with days, pay, advances, deductions and net pay — printable for the whole team in one go.
4App or web version?
Same account, same data. What differs is which device each job is comfortable on.
| Job | App | Web |
|---|---|---|
| Staff logging their own attendance | App | Yes |
| Logging attendance for the team | App | Yes |
| QR scanning, location checks | App only | — |
| Shared device at the counter | — | Web only |
| Pay period, leave, shift window, overtime | Yes | Yes |
| Work types, rates, allowances | Yes | Yes |
| How each person is paid | Yes | Yes |
| Approvals, leave requests | Yes | Yes |
| Whole-period timesheet, closing | View | Web |
| Payroll | — | Web |
| Printing timesheets and team pay slips | Yes | Web |
| Bulk-importing staff | — | Web |
| Work calendar, holidays, hourly coefficients | — | Web only |
5Four things to know before you start
- Organization mode needs a network connection. Attendance data belongs to the whole team, so it lives on the server rather than only on your phone. If the connection drops the app says so clearly, instead of quietly saving to the device and drifting out of step with everyone else.
- One account can work at several companies. If you run a shop and also do the books somewhere else, the web version has a company switcher in the top corner.
- Deleting a business has a 30-day grace period. During those 30 days everyone keeps working normally and you can cancel at any time. After 30 days all of its staff, logged days, allowances and closed periods are deleted and cannot be recovered.
- Breaks are not deducted automatically yet. A shift’s hours are clock-out minus clock-in — an 8:00–17:00 shift counts as 9 hours even with a lunch break. People paid per shift are unaffected; for hourly staff, a manager can edit the hours on the record. A later version will let you set break time once and deduct it automatically.